
 how-to
How to Match Flooring to Home Lighting: A 2026 Guide
Table of Contents
- Why Your Flooring Looks Different at Home Than in the Showroom
- Understanding the Impact of Color Temperature on Flooring
- How to Test Flooring Samples at Home in Real Lighting
- Matching Warm and Cool Lighting to Wood Undertones
- Best Flooring Colors for Dark Rooms
- Matte vs. Gloss: How Finish Changes Color Under Light
- Smart Lighting, Metamerism, and Directional Light
- Conclusion
- Frequently Asked Questions
Last Updated: September 20, 2026
Why Your Flooring Looks Different at Home Than in the Showroom
Flooring that looked perfect under showroom lights can turn muddy, yellow, or washed out at home. That is not a defect, it is lighting.
Understanding the Impact of Color Temperature on Flooring
Color temperature is a measure of how warm or cool a light source appears, expressed in kelvin (K). It is the single biggest factor in how your flooring reads once installed.
Reading the Kelvin Scale for Rooms
Most homes use a mix of these ranges:
- 2,700K to 3,000K: Warm white. Common in living rooms and bedrooms. Brings out red and orange undertones in wood.
- 3,500K to 4,000K: Neutral to cool white. Common in kitchens and offices. Keeps colors closer to true.
- 5,000K and above: Daylight white. Common in garages and workspaces. Can make warm floors look orange or flat.
Matching your flooring to the light you already have beats changing every bulb in the house.
How CRI Changes What You See
Color Rendering Index (CRI) is a score from 0 to 100 measuring how accurately a light source shows true colors. A low-CRI bulb can make a rich brown floor look dull or gray.
How to Test Flooring Samples at Home in Real Lighting
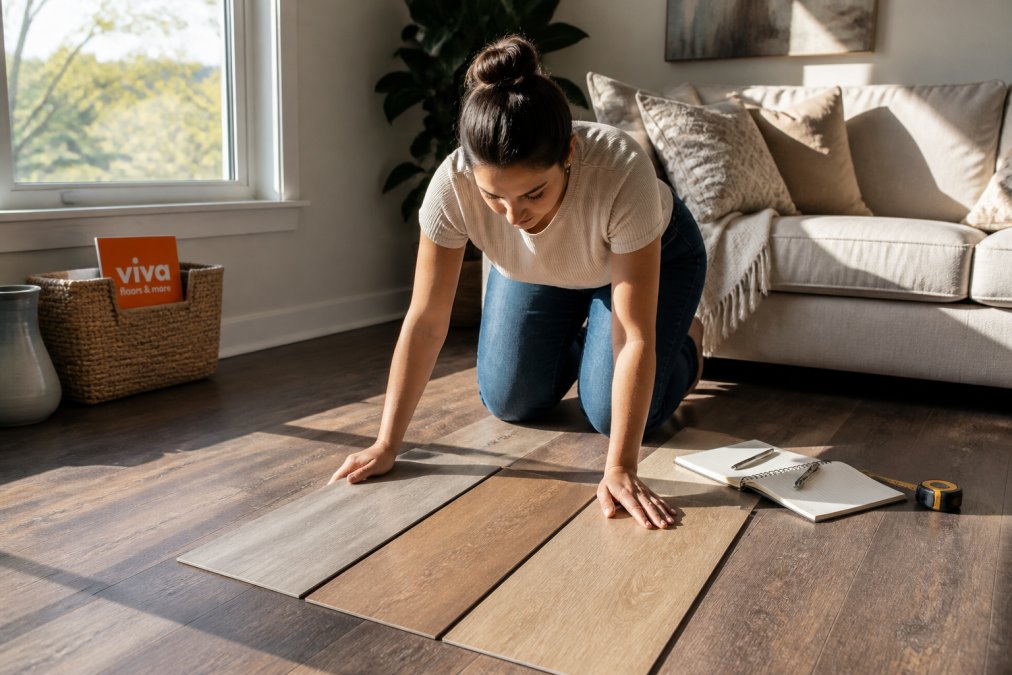
Testing samples at home is the only way to know how a floor will truly look. Showroom lighting is engineered to flatter products; your home has its own mix of bulbs, windows, and shadows. The goal is not the prettiest sample, it is the one that stays consistent across the conditions you actually live in.
Set Up the Test Correctly
Before you start, control the variables that most buyers ignore:
- Get a full-size sample, not a chip. A 2-inch chip hides grain and sheen. Ask for a plank or tile at least 12 inches long, ideally the installed width.
- Test at least three samples side by side. Color judgment is relative. A floor that looks gray alone can look warm next to a cooler plank.
- Note your bulb specs first. Write down the kelvin rating and CRI of every bulb in the room. If the label is gone, a $20 light meter app gives a rough kelvin read. You cannot interpret results without knowing what light you tested under.
- Clean the window glass. Dirty glass shifts daylight warmer and dimmer, throwing off your midday reading.
A Three-Day Sample Test That Actually Measures Something
Follow these steps to match flooring to home lighting before you commit:
- Day 1, morning (8-10 a.m.): Place samples near the main window, perpendicular to the glass so light rakes across the grain. Note which show grain and which go flat.
- Day 1, evening: Turn on every light you normally use and check samples after sunset. This reading matters most, since most households spend waking hours under artificial light.
- Day 2, midday: Look at samples in full daylight, your brightest reference point and closest thing to a neutral standard.
- Day 2, night: Turn off overheads and test with lamps only. Low-angle lamp light reveals undertones that overhead light washes out.
- Day 3, compare across rooms: Move samples to a second room with different lighting, ideally a different window orientation. A north-facing room reads cooler than a south-facing one at the same time of day.
- Day 3, decide: Pick the sample that looks best across the most conditions. If it only looks good in one of six readings, it is the wrong floor.
Read the Results Like a Spec Sheet
When you compare notes, look for these specific patterns:
- A sample that shifts warm under 2,700K but stays neutral under 3,500K is a warm-undertone floor: golden in bedrooms and living rooms, truer in kitchens.
- A sample that goes gray or green under warm light has cool undertones. It will fight any 2,700K fixture in the house.
- A sample that looks identical in every reading is very neutral or very low-contrast. Neutral floors are safest for open floor plans; low-contrast floors can look flat in large rooms.
- A sample that shows strong grain under raking window light but disappears under overheads has high texture and low color variation, dramatic in one spot, boring in another.
Matching Warm and Cool Lighting to Wood Undertones
Wood flooring has undertones that either fight or agree with your lighting, where most mismatches happen.
- Warm lighting (2,700K-3,000K) pairs well with warm undertones: honey, amber, red oak, and golden maple.
- Cool lighting (3,500K-4,000K) pairs well with cool undertones: gray, ash, whitewashed, and greige.
- Neutral lighting works with almost anything, which is why it is the safest pick for open floor plans.
Best Flooring Colors for Dark Rooms
Dark rooms need floors that reflect light rather than absorb it, the opposite of what many assume.
For dark rooms, also consider:
- Matte finishes over gloss, which reduce glare and spread light more evenly.
- Lighter wood grain with subtle hue variation, which hides dust and adds texture.
- Consistent color across the floor, which avoids patchy dark spots.
Matte vs. Gloss: How Finish Changes Color Under Light
Finish controls how light leaves the surface, which changes perceived color. Two floors with the same stain can look completely different based on sheen alone.
- Matte finish: Scatters light. Colors read softer and truer. Hides scratches and dust well. Best for busy homes.
- Semi-gloss: Reflects some light. Colors look slightly brighter and more saturated. Shows smudges more.
- Gloss finish: Reflects light sharply. Colors look deeper and more intense. Shows every mark and every footprint.
Smart Lighting, Metamerism, and Directional Light
Three lighting factors trip up even careful buyers, and most flooring guides skip them. Understanding them explains why a floor can look different in unexpected ways, and gives you levers to fix it.
Smart Lighting Lets You Tune the Floor All Day
Tunable white LED bulbs and smart fixtures let you shift color temperature with an app, schedule, or voice command, an advantage most buyers never use.
- Morning: Set bulbs to 4,000K-5,000K to mimic daylight. This is when cool-toned floors look their cleanest and warm floors can look slightly orange.
- Evening: Drop to 2,700K. Warm floors glow; cool gray floors can start to look dingy.
- Task time: Bump the kitchen or office zone to 3,500K-4,000K so colors stay close to true while you work.
Metamerism: Why Two Colors Match in the Store and Clash at Home
Metamerism is when two colors appear to match under one light source but look different under another. Different pigments reflect light in different spectral patterns; the eye averages those patterns into one perceived color, and changing the light source changes the average.
- Floor and cabinets. A wood floor and a wood cabinet can look identical under showroom fluorescents and clash in a kitchen with warm under-cabinet lighting.
- Floor and wall paint. A greige wall and a greige floor can read as the same color at noon and as two different colors at 8 p.m.
- Floor and tile. Natural stone and porcelain tile are especially prone to metamerism because their pigments and surface finishes differ.
Directional Light Changes Grain and Texture
Directional lighting comes from one strong source, a large window, a single overhead fixture, or an angled recessed can. It creates bright and dark patches across the same floor, changing how grain and texture read.
- Recessed lighting placed close to a wall throws light down and across the floor at a steep angle, exaggerating grain and making a subtle floor look busier than it did in the showroom.
- Floor-to-ceiling windows produce raking light parallel to the floor, the most flattering light for wood grain, revealing depth without harsh contrast.
- A single overhead fixture in the center of a room creates a hot spot in the middle and shadow at the edges. A floor with strong color variation looks patchy under this setup.
Conclusion
Matching flooring to your home lighting is not about finding the perfect floor. It is about finding the floor that looks right in your rooms, under your bulbs, at the times of day you actually use them.
Frequently Asked Questions
Should flooring be lighter or darker than walls?
There is no fixed rule, but contrast usually reads best. Light walls with a mid-tone floor create a clean, open feel, while dark walls with a light floor make the room feel taller. When wall and floor tones sit too close together, the space can look flat. Test both directions with samples under your actual lighting before deciding, since color temperature shifts how much contrast you see.
How does natural light change the appearance of hardwood floors?
Natural light shifts throughout the day. North-facing rooms receive cooler, bluer light that can make warm woods look gray, while south-facing rooms get warmer light that deepens red and orange undertones. Direct sun also fades some species over time, especially near large windows. This is why a floor that looks perfect at noon may read differently at 7 p.m. under lamps.
Does artificial lighting affect flooring color differently than sunlight?
Yes. Sunlight covers the full daylight spectrum, so it shows a floor's true color. Most bulbs do not. Warm bulbs around 2700K push yellows and reds forward, while cool bulbs around 4000K or higher pull gray and blue tones out of the same plank. Bulbs with a low color rendering index make everything look duller. Checking the Kelvin rating and CRI on your bulbs tells you what your floor will actually look like after dark.
How do I test flooring samples in different lighting conditions?
Take samples home and place them flat on the subfloor, not leaning against a wall. Check them at three times: morning, late afternoon, and after dark with your lamps on. Move each sample to a sunny spot and a shaded corner. Keep them down for a few days so your eyes adjust. If a sample looks good in all three lighting conditions, it is a safe pick.