
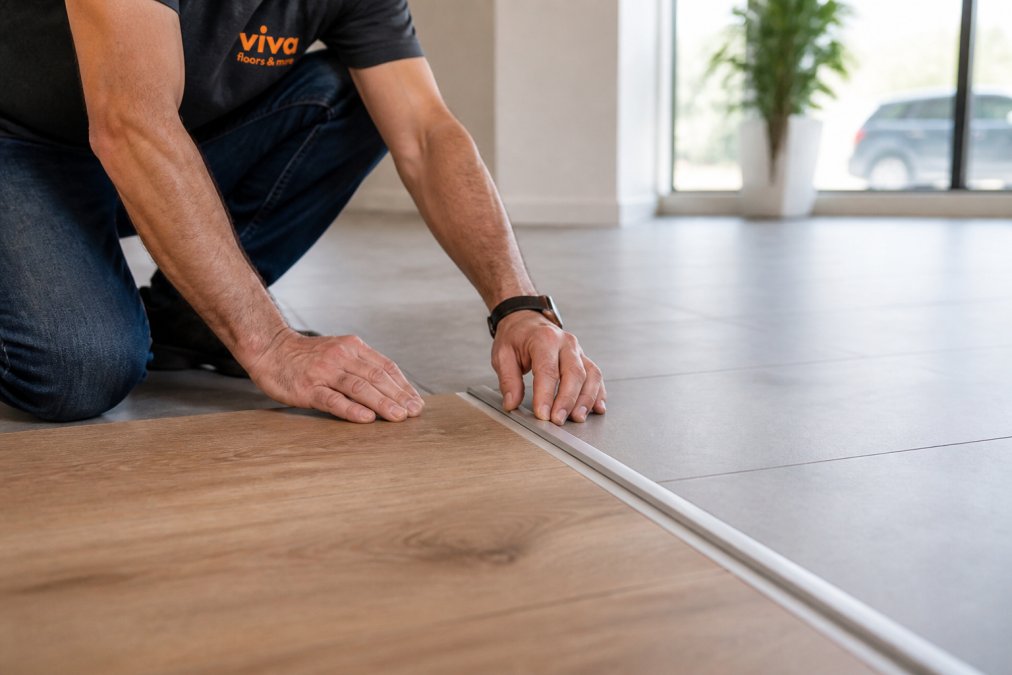
 how-to
Preventing Height Gaps in Flooring Transitions
Table of Contents
- Why Height Gaps Happen in Flooring Transitions
- How to Level Subfloor for Different Flooring Heights
- Flooring Transition Strips Types and How to Choose
- Installation Steps to Prevent Gaps
- What to Do If Flooring Planks Start Separating in Winter
- Long-Term Maintenance and Moisture Control
- Frequently Asked Questions
Last Updated: September 27, 2026
Why Height Gaps Happen in Flooring Transitions
Preventing height gaps in flooring transitions starts with one fact: no two flooring materials are the same thickness. A typical hardwood plank runs about 3/4 inch thick, while many vinyl planks sit closer to 5 millimeters. That difference has to go somewhere, and if you ignore it, you get a lip at the doorway that catches socks, trips feet, and collects dirt for years.
So why do transitions fail?
- Thickness variance between materials that meet at a doorway
- Subfloor that isn't flat, level, or both
- Expansion gaps that get filled too tight, forcing planks to lift
- Missing or wrong transition strip for the height change
- Seasonal movement that opens seams as indoor humidity swings
How to Level Subfloor for Different Flooring Heights
The best way to level a subfloor for different flooring heights is to measure each finished floor height, find the difference, and build up the lower side to match. You are not leveling the subfloor to the horizon. You are leveling it to the height of the thicker floor next door.
Measuring Thickness Variance Between Materials
Start with real numbers, not guesses. Measure the actual installed thickness of each material, including underlayment and adhesive.
- Laminate flooring: measure plank plus foam underlayment
- Vinyl plank: often 4mm to 8mm, check the box
- Hardwood installation: 3/4 inch is common for solid; engineered runs thinner
- Tile: tile thickness plus thinset plus backer board
- Carpet: pile height plus pad, measured compressed
Calculated Subfloor Buildup for a Flush Transition
Here's the method most guides skip. Say your tile assembly finishes at 1 inch and your vinyl plank finishes at 1/4 inch. You need 3/4 inch of buildup under the vinyl side.
- Under 1/4 inch: leveling compound or a thicker underlayment
- 1/4 to 3/4 inch: plywood sheets cut to fit, screwed down
- Over 3/4 inch: framed buildup or a reducer transition instead
Flooring Transition Strips Types and How to Choose
The right transition strip depends on the height difference and the two materials meeting. Pick the profile first, then the finish. Most guides stop at a table. The problem is that a table tells you what exists, not what to grab off the shelf for your specific doorway. Use the decision logic below instead.
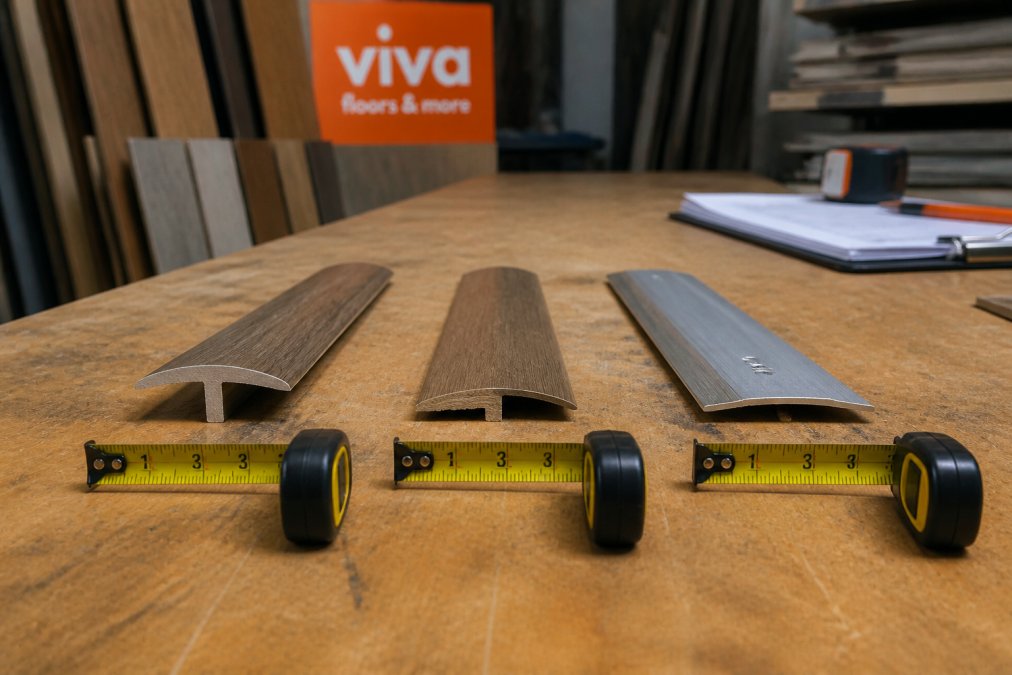
| Strip Type | Best For | Height Difference | Typical Profile Width |
|---|---|---|---|
| T-molding | Two floors at the same height | 0 to 1/16 inch | 1-3/4 to 2 inches |
| Reducer | One floor lower than the other | 1/8 to 1/2 inch | 1-1/2 to 2-1/4 inches |
| Threshold plate | Doorways, tile-to-wood | 1/4 to 1 inch | 2 to 4 inches |
| End cap | Carpet to hard surface | Varies by pile | 1-1/4 to 1-3/4 inches |
| Stair nose | Step-down edges | Full step | 1-1/4 to 2 inches |
A Visual Decision Path for Choosing the Right Profile
Work through these questions in order. The first "yes" is your answer.
- Is the height difference 1/16 inch or less? → T-molding. It bridges two surfaces of equal height and hides the seam without a slope.
- Is the difference between 1/8 and 1/2 inch? → Reducer. It slopes from the higher floor down to the lower one, so feet don't catch an edge.
- Is the difference between 1/4 and 1 inch, and the seam sits in a doorway? → Threshold plate. Flat and wide, it spans the gap and takes foot traffic without flexing.
- Is one side carpet? → End cap. The profile tucks the carpet edge and meets the hard surface flush.
- Is one side a step-down? → Stair nose. It wraps the edge and gives a finished look.
Matching Strip Material to the Floor It Touches
Match the strip material to the floor it touches. A wood reducer against vinyl plank looks off. A metal threshold in a carpeted bedroom feels cold. Here's the practical pairing:
- Wood or wood-look strips against hardwood, laminate, and engineered plank
- Metal (aluminum or brass) against tile, stone, and commercial-grade vinyl
- Vinyl or PVC strips against luxury vinyl plank and sheet vinyl
- Carpet-friendly end caps with a metal or wood face and a carpet tuck channel
Height Delta Cheat Sheet by Material Pair
Use these common finished heights to estimate your delta before you measure. Actual numbers vary by product, so verify with a tape measure.
- Solid hardwood (3/4 inch) meeting vinyl plank (5mm, about 3/16 inch): delta near 9/16 inch → reducer
- Tile with thinset and backer board (about 1 inch) meeting laminate with underlayment (about 1/2 inch): delta near 1/2 inch → reducer or threshold plate
- Engineered hardwood (1/2 inch) meeting carpet with pad (about 3/4 inch compressed): delta near 1/4 inch → end cap or reducer
- Two vinyl plank floors of the same thickness: delta near 0 → T-molding
T-Molding vs. Reducer vs. Threshold Plate
T-molding bridges two surfaces of equal height. It has a T-shaped moulding profile that sits in the gap and covers both edges.
Installation Steps to Prevent Gaps
Follow these steps in order. Skipping one is how gaps come back.
- Measure the height differential at three points across the doorway
- Level or build up the subfloor until surfaces are within 1/16 inch
- Leave the expansion gap at each wall and edge, per the flooring maker's spec
- Dry-fit the transition strip before cutting
- Cut with a miter saw for a clean, square edge
- Set the strip with adhesive or a track system
- Weight or tape it down for the full cure time
Adhesive vs. Track Systems
Construction adhesive gives a permanent bond. It works well for threshold plates and reducers that won't move. The downside: removal later means prying and scraping.
What to Do If Flooring Planks Start Separating in Winter
Planks that separate in winter are usually drying out, not failing. Indoor humidity drops when heaters run, wood and laminate shrink, and seams open at the ends. The same shrinkage that opens plank seams can also open the gap under a transition strip, because the strip is anchored to a floor that is moving.
Why Winter Gaps Open, The Mechanism
Wood and laminate are hygroscopic. They absorb moisture from the air and release it as humidity falls. When indoor relative humidity drops from a summer 50% to a winter 25%, a plank can shrink across its width by roughly 1/32 inch per foot of width. On a 6-inch-wide plank, that's small. Across a 20-foot room, the cumulative movement at the perimeter can be 1/4 inch or more, enough to pull a transition strip loose or open a visible seam at the doorway.
Humidity Targets That Prevent Winter Gaps
- Aim for 35% to 55% relative humidity year-round. Most flooring manufacturers specify this range in their warranty terms.
- Measure with a hygrometer, not a guess. Inexpensive digital hygrometers are widely available.
- Run a humidifier in the driest rooms. Whole-home humidifiers tied to the HVAC system hold the range better than portable units.
- Avoid over-humidifying. Above 60%, planks can swell and buckle at the seams.
What to Do When Gaps Appear
- Check the indoor humidity first. If it's below 35%, that's your cause.
- Run a humidifier and give the floor two to four weeks to re-acclimate.
- Do not caulk the seams shut. The floor needs to move back. Caulk traps stress and causes buckling when humidity returns.
- Do not force planks together with putty or filler. Same reason.
- Wait for spring. Many gaps close on their own as humidity returns.
- If gaps stay open past spring, call a pro to check for a subfloor or acclimation problem.
When a Winter Gap Is Actually a Transition Problem
A gap at the doorway is not always seasonal. Distinguish between the two:
- Seasonal gap: opens in winter, closes in summer, runs along plank ends or edges, and follows the humidity curve.
- Transition gap: stays open year-round, appears at the seam between two flooring materials, and often shows a loose or rocking strip.
Preventing Next Winter's Gaps
- Acclimate flooring to the home's average humidity before installation, per the manufacturer's spec.
- Leave the expansion gap at walls and transitions. A tight strip plus a shrinking floor equals a lifted seam.
- Keep humidity stable through the heating season with a humidifier and a hygrometer.
- Re-check transition strips each fall before the dry season starts, and tighten track screws or re-adhere loose profiles.
review humidity and acclimation guidance from the National Wood Flooring Association
Long-Term Maintenance and Moisture Control
Transitions last when the floor under them stays stable. Keep these habits going:
- Re-seal or re-tape thresholds every few years in high-traffic doorways
- Wipe up spills at transitions fast, especially near tile and wood
- Check for movement each season and tighten track screws if needed
- Add acoustic underlayment under floating floors to cut noise transfer between rooms
- Use a moisture barrier over concrete slabs before any hard surface goes down
Frequently Asked Questions
What is the best way to transition between different height floors?
The best method depends on the height difference. For gaps under 12 mm, a transition strip like T-molding or a reducer often works. Larger gaps may need subfloor leveling compound or a custom ramp. Always measure the exact height differential first, then choose a moulding profile that bridges it without creating a trip hazard. If you are unsure, a flooring professional can recommend the right strip for your specific materials.
Can you use subfloor leveling compound to fix height gaps?
Yes, self-leveling compound can correct minor subfloor unevenness, but it is not a substitute for structural fixes. If the height difference between two flooring materials is more than a few millimeters, leveling compound alone will not solve the transition gap. You may need to add a plywood underlayment or use a thicker transition strip. Always check the compound's maximum thickness rating and let it cure fully before installing flooring.
When should you use a T-molding versus a reducer?
Use T-molding when two floors are nearly the same height (within 3-5 mm) and you need a seamless transition. Choose a reducer when one floor is noticeably higher, as it creates a gradual slope that prevents tripping. For large height differences over 12 mm, a threshold plate or custom ramp may be necessary. Matching the moulding profile to your flooring thickness ensures a flush, professional finish.
What causes flooring planks to separate in winter?
Winter air is dry, so wood and laminate planks lose moisture and shrink. If they were installed tight without an expansion gap, the shrinking pulls seams apart. To fix it, you can try a humidifier to stabilize indoor humidity, or gently tap planks back together if the gap is small. For persistent separation, a flooring professional may need to reinstall the affected rows with proper expansion space.
Height gaps in flooring transitions come down to math, moisture, and matching the right strip to the job. Get the subfloor buildup right, leave room for movement, and pick a profile that fits the height difference. If you'd rather not guess, Viva Floors & More offers expert consultation, a huge in-stock selection from trusted brands, and help for both DIYers and contractors. Request an estimate and get your transitions right the first time.